Thursday, February 21, 2013

Recipe Redux: Oscars In The Kitchen

Happy Oscar Awards Weekend!

This month, Recipe Redux'ers have been tasked with creating a recipe from our favorite "food" scene in a movie. One that stood out to me was Julia Roberts eating pizza in Italy in "Eat Pray Love". Now, in my opinion, the book far surpassed the movie, but I digress.

Pizza is an interesting food for me. It is one of my favorite things to make, but having a dairy allergy makes ordering pizza a bit tricky. There is one fantastic place up the street that doesn't disappoint (Matt's Italian for you Jax locals), but ordering a pizza doesn't give me credit for this blog :)

A wonderful member and client of mine, Tawnya, shared her recipe for homemade pizza dough with me and I've been (dough) hooked ever since (ha!). Tawnya graciously allowed me to share this recipe with y'all, although I have made one adjustment to her original recipe which is noted below.

First, to make homemade dough, you need yeast! This step is very important, and I am not ashamed to admit that I've had to re-do this part a few times in the past.

Mix 1 packet of active dry yeast with 1 cup of warm (not hot) water in a measuring cup. Add 2 tablespoons of honey and leave it alone. Seriously- don't touch it! Allow it to activate. The honey feeds the yeast, and it will make you feel like a food scientist in the kitchen! See below:


While the yeast activates, mix 3 cups King Arthur ("high gluten content- makes the best dough" says Tawnya, and she's right!) flour, 1 teaspoon salt and 2 tablespoons olive oil in a stand mixer with dough hook attachment. The recipe calls for unbleached flour, Tanwya uses half whole wheat and half unbleached white. I've found success with all 3 cups whole wheat, but my favorite is using King Arthur Brand "White Whole Wheat".


Now, you may be asking, "how will I know when the yeast is ready?" The best method I have is my nose. When I can smell the yeast from across the kitchen, I know it is ready. It takes about 10-15 minutes. It also looks like this:


When you have reached this stage, start your mixer with the flour, salt and oil in it and slowly stream in the yeast mixture.


Continue mixing, allow your mixer to run 10 minutes. Dough should pull away from the sides of the bowl and form a ball. After the 10 minute mixing time, cover with a towel in a warm, dark place (I put mine next to my stove) for at least an hour to proof.


It will at least double in size. The longer you allow to proof, the better it is. Tanwya also mentions that you can proof the dough overnight in the fridge.

This is a great recipe to double and put half in the fridge. You will want to defrost in your refrigerator and then bring to room temperature before rolling out.

Joe likes when we make homemade pizzas because I buy him "real cheese"! Ha! It's the little things :)

Top your pizza with whatever you like. You can channel your inner Bobby Flay and grill your pizzas or bake in the oven on a pizza stone. No pizza stone? Spray a baking sheet with PAM or rub olive oil on the bottom, roll your dough out to fit your pan and bake. I like to bake the dough a little before flipping it over and adding ingredients.

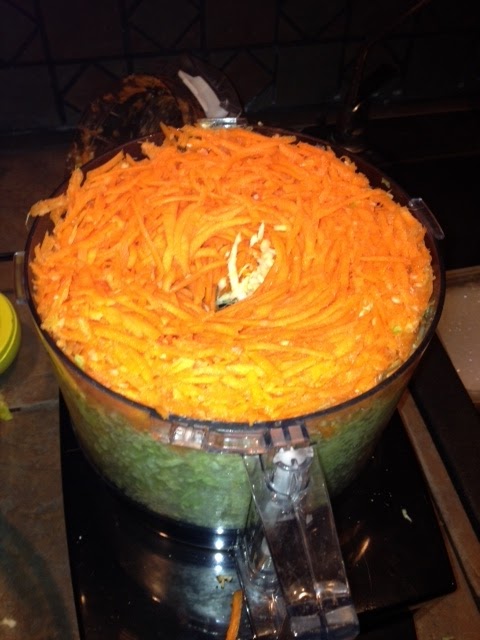
Add whatever you'd like! We use a lot of vegetables- onions, peppers, sundried tomatoes, spinach, tomatoes, olives, etc. and we love very thinly sliced Prosciutto on our pizzas. Yum-O! Turkey Pepperoni is also a hit.

Whatever healthy topics you chose, enjoy this delicious and healthy dish this Sunday while you watch the Oscars. Maybe you'll even watch "Eat Pray Love" before the red carpet. Enjoy!


Monday, January 21, 2013

Recipe Redux: A Trend in Every Pot

Happy 2013!

Let's talk about food, shall we? How about food trends, in particular? The 2013 Food Trend Predictions are in (see them for yourself: http://www.srg.com/permanent/2012/10/2013-culinary-predictions) and we have some exciting things do discuss.

First, expect to see sour, tart, bitter and acidic flavors coming out. Healthier dishes (yay!) are also increasing their portfolio in 2013. Asian influence will be prevalent in restaurants and blogs this year along with veggies as entrees (think beyond tofu... care for a cauliflower steak?) and grown up kids menus. Expect to see American Artisians pop up in your local square, along with tapas/small plates making a stand. Fruit will appear in savory dishes and popcorn will be a trendy snack. The trend I am MOST excited about is that in 2013 there will be "all inclusive menus". Think vegan menus, gluten-free menus, dairy-free menus, etc. This may not seem very exciting to you, but if you have a food allergy, this is fantastic news!

In celebration of these trends, I have created a creamy squash soup that is dairy free. And now, onto the recipe:


You will need an acorn squash (butternut would also be delish), a small onion, 1-2 cloves of garlic (I used two, but I love garlic), curry powder, turmeric, salt & pepper, chicken (or vegetable for a vegan dish) broth and unsweetened plain almond milk.

First, chop the squash, onion and garlic. No need to fuss about perfect sizes. It will all be blended in the end.


Then, add 1 tsp olive oil and 1 tsp earth balance butter (you could just use 2 tsp olive oil if you prefer) to a heavy pot and heat over medium heat. Add chopped veggies and spices.


Cook, over medium heat, 5-8 minutes until onions are slightly tender and squash begins to soften. Do not overcook, it will burn the garlic. Then, add 1 1/2 cups broth and bring to a simmer. Simmer 10-15 minutes until squash is tender.


When the squash is cooked through, remove the pot from heat and blend using an immersion blender (one of my favorite tools) or carefully blend in batches in a stand blender.


Normally I like my soups to have a little "chunk" in them, but for this recipe, it is so smooth, you will like it completely pureed. Once you have the soup completely pureed, stir in 1/2 cup unsweetened, plain almond milk.


Stir...


Then, when completely combined, serve into a bowl or mug and enjoy with a crusty whole wheat baguette toasted and rubbed with garlic clove. Enjoy!


"Creamy" Squash Soup:
1 acorn squash, peeled, seeded and diced (*Note- I usually cut the squash in half and scoop out the seeds, then place cut side down on a microwave safe plate and microwave 90 seconds to just soften the squash ever so slightly. This is a tremendous help in removing the skin!)
1 small onion, diced
1-2 cloves of garlic, roughly chopped
1/2 tsp curry powder
1/2 tsp turmeric
salt and pepper to taste
1 tsp olive oil
1 tsp Earth Balance Buttery Spread
1 1/2 cups low sodium, preferably organic chicken or vegetable broth
1/2 cup unsweetened, plain almond milk

Heat olive oil and earth balance in a heavy pot (I use my dutch oven) over medium heat. Add squash, onion, garlic, curry, turmeric, salt and pepper. Saute 5-8 minutes, until onions are tender and squash just begins to soften. Then add chicken broth and bring to a simmer. Simmer 10-15 minutes, until squash is cooked through. Remove from heat and blend with immersion blender until completely smooth. Stir in almond milk and enjoy!


Friday, December 21, 2012

Recipe Redux: Gadget Gifts

This month's Recipe Redux challenge is to share with you all our favorite Kitchen Gadgets. My first thought was perhaps too simple... your hands! Clean hands are a cooks best tool. But for those of you looking for something to purchase for the cook in your life, I recommend a Cuisinart Food Processor.


My world changed when I received the food processor as a Birthday gift. Suddenly, daunting kitchen tasks that were too large for my mini prep food processor (also Cuisinart and a recommended buy) and took precious time to chop were a breeze. I make homemade hummus weekly with this lovely gadget (recipe below), and will share with you another recipe to make for dinner tonight with your new Food Processor.

Here is my version of an Asian-inspired Coleslaw:

First, the dressing:
1 tbsp peanut butter
1 tsp toasted sesame oil
4 tbsp canola oil
4 tbsp rice vingar
1 tsp truvia
Whisk together, cover and refrigerate until slaw is ready.
*You could also make this in your mini-prep food processor or blender

For the slaw:
You'll need one small head of cabbage (any variety would work, I happen to have green cabbage from my delivery), outer leaves removed and cored, then quarter each piece. *You may need to cut even smaller depending on the size of your cabbage, it needs to fit into the food processor.
3 carrots, ends cut off
1 bunch scallions, ends cut off and sliced into 1/4 inch slices


Then, one piece at a time, add the cabbage to the food processor, with the grater attachment on. Press down on the top piece to encourage the grating along. You'll be amazed at how fast this goes!

I added three halves of carrot at a time, standing up lengthwise.


The grated cabbage & carrots:


Dump into a large bowl, add the scallions and reserved dressing. Toss to coat and refrigerate until ready to serve. It will seem like a lot (and it is!) but it goes fast and tastes delicious leftover!


Enjoy!!

Now, as promised, my hummus recipe:
2 cups cooked chick peas (or 1 15 oz can, rinsed and drained well)
2 tbsp tahini
zest and juice of one lemon
1 tsp cumin
1 tsp sea salt
1 tsp freshly ground black pepper
Add all ingredients in the bowl of the food processor with the blade attachment. Blend until ingredients begin to combine and the beans begin to crumble. Stream in 1/4 cup water and 1/4 cup extra virgin olive oil with processor running. Allow processor to run approx 3 minutes to ensure a light consistency. Store in an air-tight container in the refrigerator.
I can't tell you how long it will keep, because it never lasts that long in this house!
You'll never buy store-bought hummus again!


Wednesday, November 21, 2012

Recipe Redux: Vintage Side Dishes

When I think of a "Vintage Side Dish", the only recipe that comes to mind is my Grandma Cookie's famous zucchini casserole. Now, a little history...

Every year as a child we drove from New Hampshire to Michigan to visit my dad's side of the family for Thanksgiving. We would ride 15 hours, usually the Wednesday before Thanskgiving to Grandma's house. When we arrived, we immediately walked through her breezeway to get to the house, which doubled as a refrigerator for all things buttery and sweet. She made anything we wanted to make, baked cookies like it was going out of style for the kids (and big kids), (hense the nickname) and pickled frogs legs for my dad (yuck!!!).

Thanksgiving day was a marathon day of eating, like I am sure it is in most homes :). Grandma's Zucchini stuffing was the recipe everyone dove in for first. As Grandma got older (she lived to be 98!), my mom and Aunt Jan tried to recreate the recipe. Emphasis on tried. It never was quite the same as when Grandma made it. I have a theory that she did not share the same recipe with us that she actually used. Modifications have been made, but I am quite certain she smirks at us from heaven every year when we try to recreate this famous dish...

Grandma Cookie's Zucchini Casserole:
6 cups (or 2 lbs) of diced young summer squash
1/4 cup chopped onion
1 can of cream of chicken soup
1 cup sour cream
1 cup of shredded carrots
2 cups prepared stuffing mix (cornmeal is best)
1/4 cup butter, melted
chopped parsley

Cook squash and onion in boiling water for minutes, drain well. Combine the soup, sour cream and carrots, gently fold in squash and onions. Combine stuffing mix and melted butter. Put 2/3 of stuffing mix in greased 2qt casserole dish. spoon in squash mixture and top with remaining 1/3 of stuffing. Bake at 350 for 25-30 minutes until bubbly. Sprinkle with parsley.

Attempts to make this dish "healthier" have been unsucessful, so I encourage you to enjoy in moderation! I wish you all a safe, healthy and happy Thanksgiving!

Sunday, October 28, 2012

Mashed Potatoes

I am an advocate for a special dinner on Sunday night. Sunday is a day to try recipes that you actually have time to make or make a family favorite recipe that requires hours of simmering. Occasionally I will make mashed potatoes, and tonight was one of those nights. I do not think much of it, but Joe loves my mashed potatoes, and I don't even have to trick him into eating them! :)

Here's how I do them:

Take 1 small potato (size of a lady's fist or smaller) per person eating, peeled and cubed, and the equivalent amount of cauliflower, cut into florets, and place on a steamer basket in a large pot. Steam potatoes and cauliflower until tender. Tonight, I used two small potatoes and equivalent cauliflower (approx 1/3 of a head of cauliflower) and let it steam approx 12 minutes.

Drain the cauliflower and potatoes. Remove the steamer basket from the pot and return potatoes and cauliflower to pot. Place pot back on hot burner (turned off, but still hot). Leave uncovered and shake the pot a bit for a few minutes. This allows the steam to escape, leaving you with fluffy mashed potatoes in the end, not watery ones!

Let the steam escape for approx 5 minutes, shaking the pot every few minutes to prevent burning. You will see the steam begin to fade. Then, take your potato masher and mash away. I add approx 1 tablespoon of Earth Balance buttery spread, a heaping tablespoon of horseradish, salt and pepper to taste. That's it.

At dinner, Joe said to me, "You should really tell people about these. They are really delicious and healthy." So here you go. By request of my Southern man who loves nothing more than mashed potatoes loaded with butter (2 sticks minimum), sour cream, whole milk, and bacon.

Sometimes I think we make things "too healthy" and don't actually enjoy them. Potatoes are a nutritious food. But when we add the butter, sour cream, whole milk and bacon, the fat begins to overpower the nutritional benefit of the potato itself. By adding the cauliflower, we can increase the portion size a bit AND bump up the fiber intake. A win-win situation.

I apologize for not having pictures, we ate everything! :) Enjoy!

Saturday, October 13, 2012

The Recipe Redux: How to... Tofu!

October is Breast Cancer Awareness month, and to celebrate, The Soyfoods Council has challenged the Recipe Redux'ers to create a creative dish using... tofu!

Tofu is a wonderfully nutritious, high protein food that is made from the curds of soybean milk. Soybeans have been the focus of many studies surrounding cancers, but breast cancer in particular. Some of you may have heard that soy may increase estrogen in the body, or that it may speed the growth of estrogen-sensitive tumors. However, research leads us to believe that the benefits of foods high in isoflavones and phytoestrogens (like tofu) actually helps to protect us against this tragic disease.

Beyond the potential prevention of cancers such as breast cancer, tofu and other soy products benefit cardiovascular health by providing a protein source free of saturated fat and cholesterol and may alleviate symptoms of menopause. The benefit list is lengthy! For more information, visit www.whfoods.org and search "tofu" or the Academy of Nutrition and Dietetics www.eatright.org for peer-reviewed research.

As for cooking with tofu, it is a unique ingredient as it takes on the flavor of other foods you prepare it with. Alone, it is quite bland. I have been using tofu in recipes for years, as many of us with dairy allergies have! Here is a recipe that I have come up with in celebration of a great cause- Breast Cancer Awareness and a great food- Pumpkin! I LOVE PUMPKIN. I often prepare my morning smoothie with pure pumpkin, vanilla Juice Plus protein powder, ground flax seeds, a serving of silken tofu, a sprinkle of pumpkin pie spice, all topped off with unsweetened vanilla almond milk. Delish.

More about pumpkin later this month...

First- a housekeeping detail, “By posting this recipe I am entering a recipe contest sponsored by The Soyfoods Council and am eligible to win prizes associated with the contest. I was not compensated for my time.”

Now- onto the recipe... drum roll please!!!

Pumpkin Pie Parfait
Here are the ingredients:
1 lb silken tofu, drained
1 (15oz) can pure pumpkin *NOT pumpkin pie filling
1/2 cup confectioners sugar
1 tablespoon pure maple syrup (Please, use the real stuff. No Mrs Buttersworth in this recipe!)
1 teaspoon pure vanilla extract
1 tablespoon pumpkin pie spice
Graham crackers or Graham "sticks" as pictured

Add all of the ingredients to a food processor and puree until smooth:

Next, in a clear glass bowl or cup, crush graham crackers or "sticks"
Then, begin to layer pumpkin filling and graham crackers into a glass. Note: one serving of these Honey Graham Sticks was 14 Sticks, I used 5 in the bottom of the glass, 5 in the middle layer and 4 crushed on top. You can use your favorite variety of graham crackers, but for portion control- stick to one serving or less.

The finished product:

This filling will thicken as it sits. For better separation of layers (and to prevent the crackers from getting soggy), allow filling to thicken in a sealed container in the refrigerator and assemble right before you plan to enjoy. Which, by the way.... I did!

Nutrition Information:
Recipe as above yields 5 servings (note: may vary depending on ingredients)
Calories: 270
Fat: 5g
Protein: 7g
Carbohydrates: 48g
Fiber: 4g
Sodium: 174mg

Recipe as above without graham crackers (just filling), per serving:
Calories: 140
Fat: 2g
Protein: 5g
Carbohydrates: 23g
Fiber: 4g
Sodium: 4mg


Saturday, September 29, 2012

Cooking For One

Too frequently I hear that people struggle to prepare a healthy meal for themselves "It's just me, why should I bother?" or "It's not worth the fuss" are responses I get when I ask why one might not prepare a meal for themselves. I also hear, "wait until you are alone at night and then you will understand". Well, I can tell you that I experienced this first hand this summer. Joe was out of the state for business all summer, it was just me and Zeke. Since Zeke's meals come from Petsmart, he was not much of a foodie companion. I did learn to empathize with individuals who are at home preparing meals for "just me", but I took this experience as a challenge. Why shouldn't we prepare a healthy meal for ourselves? I admit, there were some evenings where a bowl of cereal were all I had the energy for, but that happens whether Joe is home or not!

Here are some suggestions to those of you out there struggling to prepare a meal for yourself:

1. Take the pressure off of yourself. Meals (especially mid-work-week) do not need to be fussy. Chop a few veggies (or- if you have time when you return from the store, chop and prep then!) and add to a salad. Add some low-sodium deli meat, vinegar and olive oil and viola, you have a lovely salad.

2. Keep your recipes simple. Saute a chicken breast (or two, if you want leftovers) in a skillet, season with salt and pepper. Cook until browned on each side. Remove from heat and keep warm. In the same skillet, add onion or shallot (whatever you have), dried thyme and garlic. Saute ~3 minutes. Add 1 cup chicken broth (or 1/2 cup white wine and 1/2 cup chicken broth). Slide chicken back into skillet and allow to cook through and the sauce to reduce by half. Serve with steamed vegetables (steam in the bag can be a vegetable lifesaver!) and instant (or minute) brown rice.

3. Prepare your favorite recipes, sensibly. If you are preparing a meal for one, do not prepare a casserole or your favorite dish that serves 8-12. You will only overwhelm yourself and end up frustrated because of food waste. However, if your recipe freezes well, go ahead and prepare it in 4 serving vessels and freeze 3 of them!

4. When you are at the meat counter, ask your butcher to cut only what you need. They are more than willing to package whatever you need. Alternatively, you could buy a large amount of meat, wrap them individually in saran wrap when you return home from the store and freeze them in a freezer-proof ziploc (I do this for the two of us- I wrap two chicken breasts together and store them in the freezer, I also cut ground meats into 1/2 lb portions... it helps with portion control when we get around to preparing it!).

5. I am a HUGE fan of a "Sue's Skillet Sensational Supper" (I'm working on the title, ha!). Everything goes in one skillet and it goes right to the table. I usually start with aromatics- onions, garlic, leeks, whatever I have. Then I'll add potatoes (if I have them on hand) that I have chopped (the smaller they are, the faster they cook!) and allow them to brown. From there, I add veggies- broccoli, carrots, asparagus, cauliflower, green beans, etc. Whatever I have in the fridge. Don't forget to season with salt and pepper along the way... It might be necessary to add a little white wine or chicken stock to deglaze the pan and add a little liquid to steam the veggies. Once they have cooked, I'll add in fresh herbs. Sometimes I serve this with steamed rice instead of potatoes. Also- if you add meat (a must if Joe is home), you can brown chunks of chicken, or frozen shrimp (de-frost in no time) or extra lean beef tenderloin (about 3 ounces for one, 6 ounces if you want leftovers) before you saute the onions and garlic. Just remove them when browned and keep warm. Return to skillet when you add in your herbs. When it was just me, I ate a lot of beans- I kept cooked beans in individual sized baggies frozen in my freezer. I'd put it in the fridge in the morning and have them ready to go by dinner time. I usually add the beans when I add the fresh veggies to the skillet.

Today's take home message: just because you are one person in the house at dinner time, does not mean you do not need to nourish your body. Keep it simple, but make it enjoyable. Try to sit down and eat! A lovely woman told me once that every night she set the table for herself. She set out a beautiful place setting, with her nice cloth napkins and lit a candle for herself. It was her quiet time to sit, reflect on her day, and enjoy a healthy meal. Plus- she told me, "I have service for 12, so I only had to wash my linens every other week!" There is always a silver lining!

Here is to a healthy day!